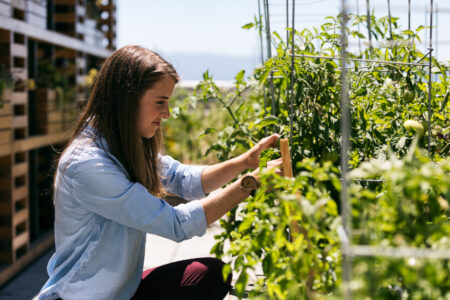
Though there are a few common problems with rooftop gardens, a DIY rooftop garden can help prevent wildlife pressure while you’re growing your own food.
I’ve always loved gardening. I grew up in a suburb of New York City, where I helped my family garden. So when my husband and I moved our family farther upstate, I looked forward to big, beautiful gardens on our 1-acre lot. What I got instead was an influx of destruction.
Every attempt at a vegetable garden turned into a feast for local wildlife. Chicken wire? The deer laughed at that. Wooden picket fencing? The chipmunks squeezed right through, and the groundhogs gnawed themselves an entryway. When I found a chipmunk running away from my damaged garden with a cherry tomato in its mouth, I’d had enough.
Our house is roughly barn-shaped, with a deep gambrel roof sloping down to the front and back. As a result, the tops of the house and the attached garage are flat. When our children were young, we set up a baby pool on the garage roof each summer; with southern exposure, the location was perfect. By 2018, they’d outgrown baby pools, and the roof deck laid dormant. I eyed my damaged garden attempts, and then eyed the deck. It was the perfect spot for a garden: constant sun and easy access through a sliding door, as well as gated stairs from our back deck. Before we could enjoy any bounty, however, we needed to do some research.
Our house was built with steel I-beams, rather than wood. During a home inspection, our inspector remarked that the roof deck’s structure could support an entire story if we’d ever want to build onto it.
Water, soil, drainage material, and plants weigh more than you think. Rooftop gardens can be “extensive,” such as potted plants or container gardens, or “intensive,” where the garden’s design is incorporated into the roof itself. While extensive gardens weigh about 20 to 34 pounds per square foot, intensive gardens range between 80 and 150 pounds per square foot, according to “A Guide to Rooftop Gardening” provided by the City of Chicago Department of Environment. That’s heavier than most roofs can withstand. So if you’re considering a roof garden, have a professional engineer or architect look over your site first.


Our deck is covered with a thick rubber roof, and it’s angled toward a center drain that pipes water off the roof via PVC piping. We placed our raised beds carefully, taking drainage into consideration, and the system has held up through the past three years. If I had to start over, I’d add an extra layer of root barrier (heavy puncture-resistant membrane) under the beds.
For the beds, I bought eight 12-foot-long kiln-dried 2×6 planks. We cut them each into 8-foot and 4-foot pieces and built the beds two planks high, using 1-inch-square lumber at the corners to secure the screws. We lined the beds with landscape fabric and added small rocks we scavenged from the woods, and then it was time for dirt.
Our property contains heavy clay and is thick with rocks, so I had topsoil delivered. Our local extension office was a good resource for soil testing and safety tips. Susan Gloria Ndiaye, community horticulture educator with Cornell Cooperative Extension of Orange County, New York, recommended asking where the supplier sourced the soil, as soil can harbor weed seeds, disease, and pests. Our topsoil came from a reputable supplier, and we haven’t had any problems. We did have an issue, though, with getting those yards of soil from the ground up to the deck — a good dozen feet or more above.
Enter the pulley system: My husband loaded 5-gallon buckets with soil, and my teenager hoisted up the buckets with a rope while I raked the soil into the beds. After two years, the soil settled to less than 10 inches deep, so I asked our neighboring horse ranch if they had any composted horse manure to offer. They pointed us to a grassy, weedy knoll, and we dug up several buckets’ worth of garden gold that I mixed into the beds. Sure, we got some weeds, but one of those was purslane, a great addition to spring salads, so I called it a win!
Over the past three years, our veggie selection has expanded. I started with zucchini, bell peppers, tomatoes, bush beans, Brussels sprouts, cucumbers, beets, radishes, and some flowers.
Each year, I rotate the larger plantings — the tomatoes, cucumbers, and peppers — between the beds. I grow a few perennials (garlic chives, oregano, and mint) that don’t move. I added two rolling planters for herbs, such as thyme, rosemary, parsley, and sage. This year, I had my teenager dig out an old kid-sized picnic table from my neighbor’s trash, which we made into a 4-foot-square bed for squash.
Next year, I plan to add drip-tape irrigation. The past couple of years, I used a soaker hose, but we store it in the shed, and last winter, mice chewed that option apart. This year, I ran a hose up from our front spigot; I didn’t mind standing around during the daily watering, but by the end of the season, I was looking forward to just turning on the faucet and walking away!
I’ve learned a lot about plants, watering, insects, and, in particular, which vegetables my family likes, and what I’ll avoid planting next year. The planning is almost as much fun as the planting, and gives me something to do over a long winter.
Jane Anderson is a freelance writer and editor who enjoys gardening, reading, and cooking, as well as hiking the trails near her home in the Hudson Valley. Follow her on Instagram@HVJane4942.


