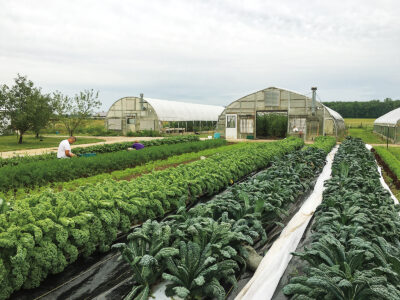
Not too long after we moved to our small farm, we realized there was work to be done before we could start growing produce to sell. Posts in the barn were leaning over, in need of support. Paint had completely peeled from the old chicken house, leaving bare wood. We had a well, but no water hydrants. And while the barn could house animals, it wasn’t set up for processing vegetables.
So we decided to spend our first year on infrastructure: building greenhouses, installing drain tiles, remodeling a processing room, building a driveway, and otherwise organizing the farm. By taking time to build up our farm’s infrastructure early on, we set ourselves up for smooth sailing for many years ahead.
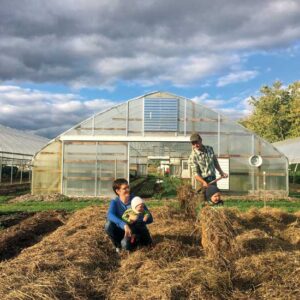
Based on our experiences, we recommend that you establish these eight pieces of infrastructure for any farm you’re taking on.
1. Processing Room
A small-scale vegetable farm requires a processing room about the size of a one-stall garage. It should be well-lit and easy to sanitize. Ideally, the walls will be covered with panels that can be hosed down, and the floor will be finished and easy to mop. It should be insulated and heated if you plan to grow produce to sell all winter.
The processing room on our farm is a former milking area. When we bought the property, we removed 11 stanchions and filled in the manure trough. Later, we insulated and painted the walls and added a small gas heater. We use our processing room to wash greens in tubs and pack orders into boxes going to customers.
Inside the room is a hand-washing sink with soap. We ask workers to wash their hands at this station before handling food. We use a small electric hot water heater to warm wash water in winter, and we use a four-bay stainless steel sink (with bays measuring 20 by 28 inches and 18 inches deep) to wash baby greens and microgreens. As an alternative to sinks, some growers use sturdy stock tanks and even porcelain-enameled bathtubs. Above our sink is a 1-inch water line with short lengths of garden hose for quick filling. A drain in the floor carries drainage water out through a buried 4-inch plastic drain tile.
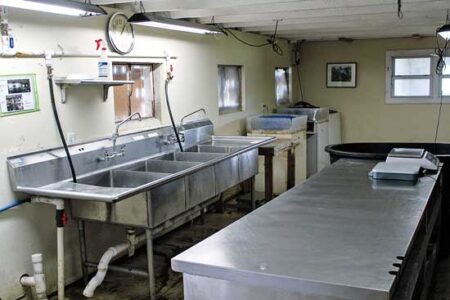
Past the sinks are two spinners — old washing machines — for drying greens, and behind the sinks is a 30-inch-by-6-foot stainless steel prep table and an 18-inch foot-operated bag sealer. Open shelves behind the table hold packaging supplies and rags. We bought our sinks and the table from a bar going out of business, and the bag sealer from the packaging company Uline. We got the washing machines for free from a family member because they were defective, but we only needed them to spin for our purposes.
Across the hall from the processing room is a magnetic whiteboard where we tally orders and use indicator magnets to show whether jobs are complete. Under the whiteboard, a table holds harvesting gear: nitrile-coated gloves, 24-by-1/2-inch produce twist-ties for bunching, size 64 rubber bands for banding kale and head lettuce, 4-by-4-inch sticker labels for wholesale bags, a roll of 2-inch painter’s tape for labeling totes, and a cup of markers.
2. Spray Station
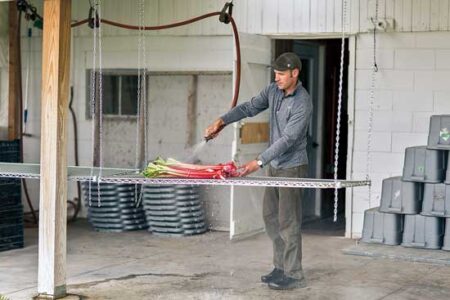
Your farm will also need an area about the size of a small garage for spraying carrots, radishes, and other crops with water. An open-air lean-to will suffice unless you grow early or late in the year, in which case you’ll want walls. Our spray station is a lean-to that we added to the barn, just outside the processing room. We used leftover parts from a greenhouse project to install two curtains that we can roll up or down, depending on the weather.
In addition to hosing tables, the lean-to houses totes and crates for harvesting. When we built the lean-to, we poured a cement slab that slopes to a drain basin in the corner. From there, water runs out through a 4-inch drain tile. We use two stainless steel shelves from a restaurant shelving unit as a spray surface. We used to support these shelves with crates functioning as table legs, but then an intern thought of a better idea: to hang the tables with chains. Now we can quickly squeegee under them.
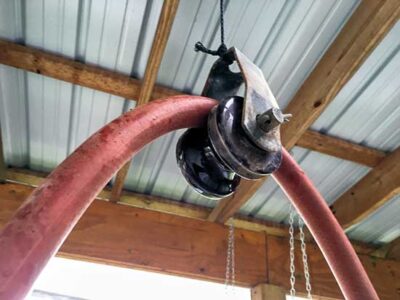
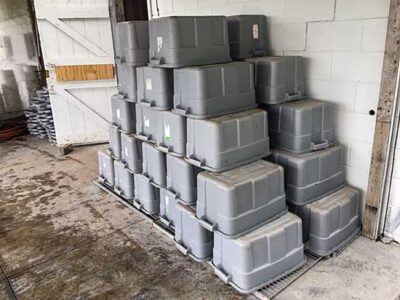
Another recent change was to hang the 3/4-inch hose. This saves us from tripping, makes cleanup faster, and positions the hose ergonomically for washing. After consulting with a well service, we increased the diameter of the underground water line feeding the hose, from 3/4 to 1-1/4 inches, to create high pressure. We use a brass shut-off valve as a spray nozzle. Since we spray totes and crates in the lean-to, we also store them there. The crates stack. We store the totes in a pyramid until dry, and then we collapse them.
3. Cold-Storage Rooms
Many produce farms have two cold-storage areas: one with temperatures that fall between 55 and 60 degrees Fahrenheit, and the other with temperatures between 35 and 40 degrees.
We call the 55-to-60-degree room our “tomato room.” We use this room to box and store tomatoes and basil in the heat of summer, and to house storage vegetables in fall. The room is 6 by 11 feet and is cooled with a standard window air conditioner. To set up a 35-to-40-degree room, we bought a used 8-by-8-foot walk-in cooler box from a restaurant salvage business. We cut a hole in the back wall for an air conditioner that we regulate with a CoolBot external thermostat. The CoolBot and AC combination cuts costs in two ways: It’s much cheaper than a standard walk-in cooler condenser and evaporator, and the AC uses less energy. An alternative to a walk-in cooler is to build your own super-insulated room. We use the cooler to store all produce except tomatoes and basil. In winter, we plug in an electric heater to keep the room just above freezing.
These two small air-conditioned spaces will suffice for a small farm. As your farm grows, you can always add on more rooms, with more temperature options suited to specific crops.
4. Storage Shed
Another essential building is a storage shed — again, about the size of a small garage — for housing equipment and supplies. You don’t need heat or insulation in this building.
To create ours, we walled off a portion of an old chicken house. Inside, we store four pieces of equipment: a tractor and walk-behind tractor (these don’t require warmer temperatures in winter), a Jang seeder, and a paper pot transplanter. Two shelves hold tightly rolled row covers. Other shelves hold tarps, irrigation supplies, and trellising supplies. In one corner, we set up a small repair bench for sharpening tools and fixing handles. Because we farm with few tools, a small space is adequate.
A low-cost alternative is to use part of your greenhouse to store these items, although around March every year you might become jealous of the space. Think of what you could grow there!
5. Gas House
I recommend that all farms set aside a small shed for storing gas, oil, and other flammable liquids. These items smell, pollute the ground, stain floors, and, of course, can burst into flames. They deserve a room of their own, set apart. We have two 55-gallon drums — one for diesel and one for gas — that we keep in a building the size of an outhouse, along with rags, engine oil, and other tractor and gas engine fluids. The building sits 20 feet away from the others and can be locked for safety and security.
6. Red-Tag Room
We sort tools every spring and fall, placing those that don’t add value — that aren’t a part of our growing system — into a red-tag room until the next regional consignment auction, when we’ll get rid of those items. The red-tag room helps us focus on our work by eliminating clutter. We can still go back and pull out an item if we wrongly placed it there, and sometimes we let one or two auction cycles pass before definitively getting rid of a tool. We think of the room as a vacuum cleaner, constantly sucking waste from the property. We use a walled-off corner of our barn, about 12 by 12 feet, for this purpose.
7. Irrigation System
A serious market garden requires a high-flow source of water. On our previous property, we used a portable gas pump to irrigate from a nearby canal. A 3-inch hose with a plastic head sat in the canal. Water passed through a sand filter system to keep small particulate matter out of the lines. If you plan to do the same, be sure to place the pump close to the water source rather than close to the garden, because pumps push better than they pull.
On our current farm, we rely on a 4-inch well to supply both our house and the farm. We use two pressure tanks — a 30-gallon and a 60-gallon — for plenty of capacity. We run 1-1/4-inch water lines 4 feet underground to our hydrants. The frost-free hydrants feature 1-1/2-inch-diameter pipes, wider than standard 3/4- or 1-inch pipes, to increase flow. The water is kept at a pressure of about 60 pounds per square inch (psi). Many online charts can help you choose a good well diameter, pump, tank size, and water line diameter for your needs, although I recommend consulting with a professional when designing your own system.
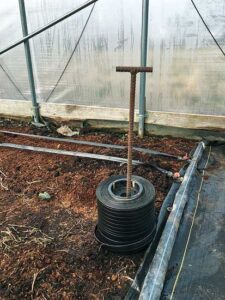
We use two types of irrigation: drip tape and overhead sprinklers. We use drip tape with pre-punched emitter holes on crops we grow under plastic or landscape fabric, including kale, tomatoes, peppers, zucchini, and cucumbers. The drip tape provides consistent moisture, uses less water, and keeps leaves dry — especially important for tomatoes. Our drip tape parts consist of a 2-inch header line, sufficient for long runs; shutoff valves; and 8-millimeter drip tape. We don’t use caps on the end of the drip tape. Instead, we tie them off by hand, using one or two simple knots of the tape itself. We use the drip lines until they get plugged up with mineral deposits, which usually happens after two seasons. To save lines for later use, we wrap them tightly and store them in tubs. We repair leaks with in-line couplers, but we’ll replace the line if there are more than two leaks.
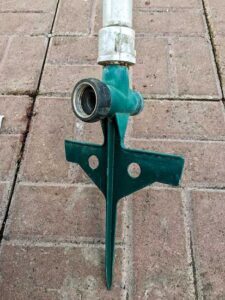
We use overhead sprinklers on crops grown in bare ground (not in plastic or landscape fabric) because they’re faster to set up than drip tape. The heads will support interchangeable nozzles, depending on droplet size desired. We use a medium-sized nozzle. In our experience, larger-diameter nozzles produce big droplets that displace seeds; droplets from smaller nozzles drift away in the wind.
We started with a step spike base for a garden hose and sprinkler, such as those made by Orbit, for our overhead sprinklers. Then, we assembled a riser with 3/4-inch PVC pipe and fittings. Ours are 4 feet tall, slightly taller than the tallest crops we plan to irrigate. Finally, we screwed on Senninger Xcel-Wobbler heads. In winter, we remove the heads and store them in a lidded bucket to keep spiders from building nests in the orifices. To connect hydrants and risers, we use 3/4-inch commercial-duty hoses that lie on the inside edge of our plots. We use quick-connect fittings to attach the hoses to the hydrants. Poly tubing is stiffer to move about, but it’s cheaper.
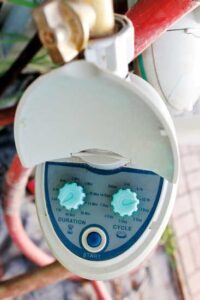
Timers make up the final piece of our irrigation system. We use two professional-duty timers by Galcon. The first is a simple two-dial timer for general maintenance irrigating. One dial lets us choose duration — from two minutes to nine hours — and the other lets us choose how often — from every three hours to every two weeks. We can change the settings in a matter of seconds. Because there’s no LCD screen, the timer is durable. The second timer is a daily or weekly programming timer, which allows for more precise programming, though it’s not as simple to use. We reserve it for germinating seeds when we direct-seed.
8. Vehicle Access Lanes
A final piece of infrastructure that’s often overlooked is a vehicle access lane. You don’t need polished concrete, but you do need access to your growing plots and buildings. We built a lane running in front of our greenhouses and connected to the processing area. We can access these areas any time of year by vehicle, and trucks can bring heavy loads of manure or compost on site without getting stuck. To build the lanes, we started with a 6-inch primary base of No. 2 (3- to 4-inch-diameter) limestone, topped with a 2-inch layer of No. 72 (less than 1-inch-diameter) limestone.
This article is excerpted from Ben Hartman’s book The Lean Farm Guide to Growing Vegetables: More In-Depth Lean Techniques for Efficient Organic Production (Chelsea Green Publishing, 2017) and is reprinted with permission from the publisher.

