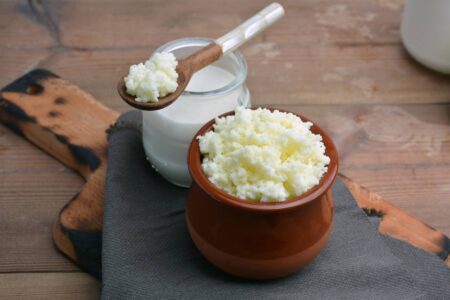
Learn how to make cheese from milk and lemon juice–known as homemade farmers cheese–and you’ll have a 30-minute cheese from two ingredients that can yield fresh chevre blanc, queso blanco, or queso fresca.
I especially love that this is one of those “How to Make Cheese at Home” recipes that is a use for sour milk. If you have milk that you think is past the “use by” date or starting to be sour, don’t throw it away. Make homemade farmers cheese! One gallon of milk will produce about one pound of cheese.
Video

Aur ‘DaEnergyMon’, is a NABCEP Certified Solar PV Installer. His name Aur (pronounced “or”) means light or to enlighten in Hebrew.Aur Beck has lived completely off-grid for more than 35 years.. He can be reached at tech@AESsolar.com . Aur is a presenter atThe Climate Reality Project, a fellow addict atOil Addicts Anonymous International and a talk show co-host atWDBX Community Radio for Southern Illinois 91.1 FM. Find him on theLiving Off Grid, Really!?!?Facebook page, and read all of Aur’s MOTHER EARTH NEWS postshere.
All MOTHER EARTH NEWS community bloggers have agreed to follow our blogging guidelines, and they are responsible for the accuracy of their posts.
Directions for Homemade Farmers Cheese
- Warm your milk up to between 180 and 190 degrees (the older the milk, the lower the temperature required for this recipe). Use a thermometer.
- Keep stirring milk to avoid it sticking or producing a film on the top.
- To test if your milk is at the right temperature, use a big spoon to take out a little of the milk and add a little sour — either lemon juice or vinegar — to see if the milk sample curdles in the spoon.
- When you pour your sour into the warm milk, do so as slowly as possible, while stirring, until it forms curds. If you put in too much sour, the cheese will taste sour. We ate so much sour cheese when mom was first learning how to make homemade farmers cheese that now prefer it with a little sour zing.
- Set up a pot with a colander or strainer lined with a cheesecloth. Pour the cheese mixture through the cheesecloth-lined colander or strainer.
- Save the whey. Boiling the whey will free the stuck- to-the-pan burnt milk. No matter how much you stir, there will be milk browned to the pan unless you use a double boiler which I never do as I use the whey. I used to laugh at my mom for reusing the whey but now follow the same process to clean the pan.
- While the cheese is very hot, it is the best time to add your flavors in order for them to become “baked in”. I highly recommend flavoring the cheese as it is very difficult to avoid it having some sour taste. Although the cheese is immediately ready to eat, the longer it drips, the more solid the cheese will become. You can even hang the cheesecloth above the sink or a bowl to drip for a while or just put in a container for a soft spreadable cheese.
- Start eating your cheese right away, or form it up and store in the freezer.
The flavors I like tend to be savory, such as garlic or Italian seasoning, but my ultimate favorite is cinnamon-raisin. Freezing this cheese does not seem to change texture or flavor. In the spring when we had tons of milk from our goats, we would make lots of cheese and freeze it in 1-pound chunks. This is so simple to make we never got around to making the more common aged hard cheeses.

Aur Beck has lived completely off-grid for over 35 years and he works as Chief Tech for AES Solar. He has traveled with his family through 24 states and 14,000 recorded miles by horse-drawn wagon. Aur is a presenter at The Climate Reality Project, a fellow addict at Oil Addicts Anonymous International and a talk show co-host at WDBX Community Radio for Southern Illinois 91.1 FM. Find him on the Living Off Grid, Really!?!?Facebook page.


