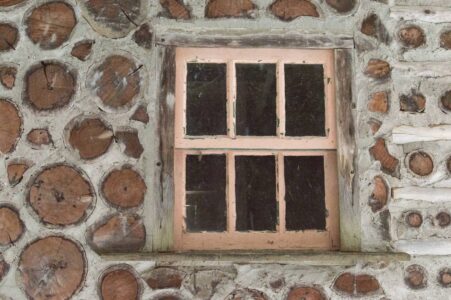
Post-and-beam construction combined with cordwood barn building produces a farmstead outbuilding that protects livestock in the winter and can handle many other duties.
As a part of the development of MOTHER EARTH NEWS’ Eco-Village research center, we began–in the spring of 1981–to gather a small collection of homestead animals. For the most part, the critters are either allowed to roam or are tethered (or fenced) for pasturing in whatever field has reached the appropriate stage of growth. (Our pigs, for example, have spent most of the past summer in the woods, while the sheep and our new cow have been moved around from one pasture to another.)
But when the air grows chill, animals (like people) need protection, and–even in our fairly mild North Carolina climate–a shelter is a necessity for anyone who’s keeping livestock. Fortunately for limited operations such as ours, though, a barn can do more than simply serve as an animal house. We’ve recently finishing building a barn that combines post-and-beam and cordwood construction, and think it’s a good example of do-it-all outbuilding design.
Multipurpose Facility
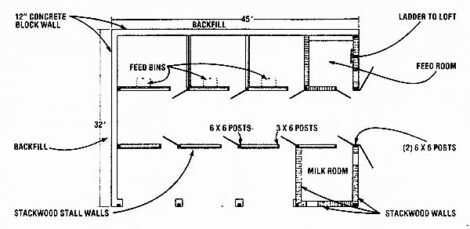
When we began to sketch out what use we hoped to get out of our barn, we had to face the fact that we’d likely never dedicate the entire structure to the care of one kind of livestock, nor would we be storing just one variety of feed. And true to our projections, the new barn houses critters ranging from horses to rabbits, serves as a milk-processing center, and holds hay, wheat, buckwheat, animal straw in its loft. Consequently, you should probably consider our multiple-duty floor plan as a general example of barn use. Folks who decide to employ the basic construction techniques that we’ll outline here may want to arrange their own layouts to suit their particular needs based on the ample footings we’ve included in our design.
The Structure
At 32′ X 45′, our barn is larger than the average outbuilding but considerably smaller than a full-scale dairy barn. Furthermore, its 10″-deep, 24″-wide footings offer the possibility of dividing the ground floor into stalls as small as 10′ X 10′, but the interior could easily be left more open (though the posts are an integral part of the load-bearing structure).
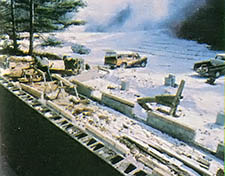
The 45-foot back wall and one 32-foot end wall are earth-bermed and were erected from 12″ concrete block, mortared and stacked to a height of 10 feet. To withstand the pressure of backfilling a core of every second block was reinforced with two lengths of No. 4 rebar and filled with concrete. Before the backhoe pushed the earth against the walls, we tarred the exterior of the block surface, and laid on 15-pound felt and 4-mil polyethylene. In addition, we placed 4″diameter plastic drain tile ( over a 4″thick bed of gravel) against the footers, and poured another 8″ of rock atop the ABS pipe to prevent it from plugging with mud.
Both 3 X 8 and 8 X 6 posts (rough-sawed from oak, hem pine, and white pine) make up the second-story support framework, and angle braces are used to connect the posts to concrete block stands built up from the footers. The connecting beams are also 6 X 6 rough-sawed timbers, and are supported by both the 6 X 6 posts and the 3 X 6’s that brace the gates. The beams are tied to the posts with 1/4″ X 6″ X 18″ steel plates and 1/2″ bolts, as well as by bolted 3 X 6 diagonal beams. Longer 3 X 6 diagonals also span the boxed-in sections at the open end of the building to add strength.
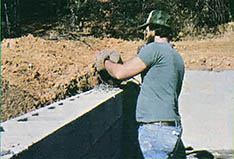
We built sills on the 6 X 8 beams by nailing two 2 X 8’s together, and then toenailing the doubled boards–on edge–on top of the timbers. A pressure-treated 2 X 8 sill was then tied to the crest of the block wall to level things up for the addition of 2 X 8 floor joists on 16-inch centers.
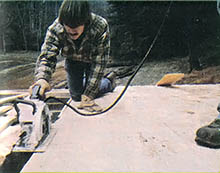
Laying down the rough-cut 1″ flooring on the framework presented quite a challenge, since few of the boards were of the same width. To insure that the spacing would work out correctly, our crew started laying the lumber in the center of the floor, and worked to the edges (across the 32-foot dimension). After every two feet of outward progress, they dropped a chalk line along the 45-foot dimension and ripped along the entire length to even up the irregularities in width.
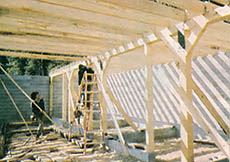
In order to get the greatest possible use from the loft, we decided to build the roof as a free span, thereby eliminating the need for interior roof-supporting posts. The 2 X 8 rafters were tied into the flooring and sills with spikes, and plates were wedged between them to provide additional support. The span itself is a self-supporting angled arch that consists of a 12-in-10 pitch proceeding from the floor, and a 3-in-12 pitch finishing to the roof peak. A vent runs the length of the peak to help keep the loft from overheating or retaining too must moisture. The roofing material is galvanized metal, laid on 1 X 4’s running perpendicular to the rafters. The result is a truly spacious loft that measures 13 feet at its highest point.
Finishing Touches
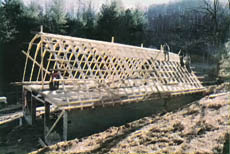
We closed in the end the loft with standard framing on 24-inch centers, using 24″ purlins. Then the same 1″ rough cut lumber that made up the flooring was applied to the framing as siding. Generous double doors are centered in each end, but–as a result of the earth berming–one loft door is at ground level (to make bringing hay, or whatever, into the upper level an easier task), while the other is at second-story height (to facilitate loading the contents of the loft into truck or wagon). We also placed a 16″ X 72″ tapered gable-end vent above each pair of doors to further assure proper ventilation of the space. To ease the job of getting feed downstairs to our barn’s hungry clientele, a 29″ X 30″ trapdoor was cut into one corner of the loft floor, and the appropriate cripples were then added from below. While bales of hay can be simply dropped through the opening, a ladder allows bipeds to climb down into (or up out of) the feed room below the loft.
The walls of the feed storage room and the milk room (as well as the partitions between stalls) are formed from cordwood set between the post-and-beam framing. The logs for the cordwood partitions were cut to 12″ lengths at the site and then carefully mortared into the spaces between the timbers. Our stackwood walls are (we think) very attractive, and there’s no question that building them was inexpensive.
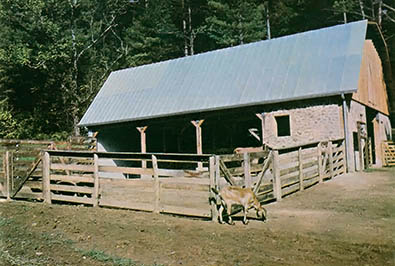
About 5,000 board feet of lumber wet into our barn, but we were able to obtain 3,800 feet of it from trees that had to be cut to make room for the structure. Thus we managed to get the bulk of our lumber from a local sawmill.
Originally published as “Mother’s Stackwood Barn” in the November/December 1981 issue of MOTHER EARTH NEWS.

