DIY shag rugs made of old clothes are durable, attractive, easy to care for, and can be machine sewn in a few hours.
After years of looking for the most durable, yet simplest homemade rugs to wash, I have finally hit on a winner – shag throw rugs made of old T-shirts and towels. Besides being easy to make and care for, the rugs are fabricated from goods from the rag bag.

With animals inside and outside our homestead, a steady flow of boot traffic and abundance of rain, we go through a lot of rugs here. Rubber-backed store-bought rugs are OK on the back porch, but impossible to keep clean in the house.
Braided rag rugs, while lovely and comfortable to stand on, turned out to be too difficult to wash. To clean them, I’d wait for warm, breezy days and then scrub them in a tub outside. By the time I’d hoisted the wet, heavy rug onto the clothesline, it was as if I also took an outdoor bath. It also takes me at least two weeks to make a single rug.
Looking for a solution, I decided to try a simpler method of rug making. The result is an easy-to-make, inexpensive, attractive, cushy, sturdy and easy-to-clean rug. I used jersey T-shirts (100-percent cotton) for the shag, but any knit fabric that doesn’t unravel will work, such as from fleece blankets and sweatpants.
My backing material is a piece of terrycloth bath towel that matches some of the shag strips. But again, any durable, non-stretchy fabric will work, so long as it is not too thick to sew on your machine. For your first project, you may want to begin with a small size.

How to Make a DIY Shag Rug
- Cut a base of durable, non-stretchy fabric and turn under and sew the raw edges.
- With a marker, draw lines 1/2 inch apart, either lengthwise or crosswise on the fabric base with the sewn hem facing up. (The hem will later be hidden by shag strips.)
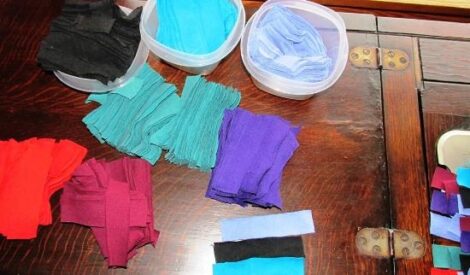
- Cut 1-inch by 4-inch strips (or shorter for less shagginess) of knit fabric. I used the bottom half of 15 T-shirts in various sizes. Discard pieces with seams, embroidery or printed designs. (I save the sleeves and shoulder pieces for household rags or other projects.) For a 20-inch by 25-inch rug, I cut 1,800 strips, the most time-consuming part of this project, but easy with a rotary cutter.
- For a random pattern, put the strips into a large box to fluff and separate the pieces after cutting. Or fluff each color separately and keep in piles to form a rug with stripes or other design.
- Use good thread and a fairly tight stitch. Anchor the beginning and end of each row by backstitching.
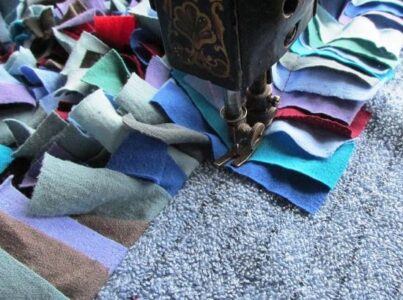
- Place the base in position for machine sewing the first row of strips. Line up about 10 inches of strips on the first marker line. Working from your body toward the machine, layer the strips like shingles so you can sew without having to stop and guide the strips under the presser foot. Continue this method of layering and sewing each row until complete.
![]()
All MOTHER EARTH NEWS community bloggers have agreed to follow our Blogging Best Practices, and they are responsible for the accuracy of their posts. To learn more about the author of this post, click on the byline link at the top of the page.


