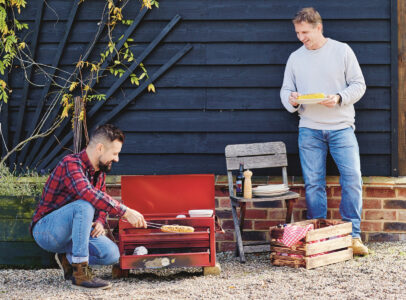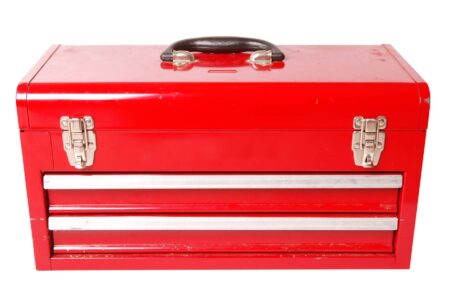
I always strive to combine form and function, so I was keen to have a series of cooking levels that could be varied for searing, cooking and keeping food warm. The toolbox is made from the same thickness of metal as most barbecues, and with several drawers of varying depths it seemed perfect for what I needed it to do. The top compartment offered an obvious cache for storing tongs, skewers and other essential cooking tools. It just needed the addition of carry handles, so you can take your new upcycled, self-contained barbecue wherever you fancy, whether it’s the back garden, a festival or the nearest beach. I knew I wanted to produce a barbecue for this book that was unique and quirky, and here was the answer.

Items to Source:
- Metal toolbox with drawers
- Old barbecue grills
- Old leather belt
- Metal rivets

Instructions:
- Mark out Drawers: Empty your tools from the toolbox, give them a clean and a new home! Mark out the bottoms of the drawers to be cut, keeping a lipped frame all round to locate the grill. When cutting out a square or rectangle the corners can be tricky and create weak points. If you drill a hole in each corner before you cut, it makes for a neater, stronger result.
Tip: Cone cutters are a great versatile tool to have around your workshop. They allow you to drill a variety of hole sizes the further up the cone you go, ideal for cutting these corner holes in this steel.

- Cut out Bases: Using an angle grinder with a cutting disc, remove the bases of the drawers. Watch out for flying sparks — wear appropriate clothing and safety goggles or a welder’s mask to protect your eyes.

- Smooth Edges: Sand the cut edges with a sanding disc on your grinder. (Remember to disconnect the power when changing attachments!) To finish, use a small round file to get right into the corners.


- Cut Grills to Size: Using the natural dimensions of the salvaged barbecue grills, decide which way round they are going to be used, maintaining as much structural integrity as possible. Trim to fit with your grinder then sand the cut edges to ensure they are not sharp.

- Assemble: I even managed to rescue the temperature gauge from the donor barbecue, so simply drilled a hole and bolted it on! Now assemble the barbecue by dropping in the grills.


- Attach Strap: To increase portability I added a brown leather strap made from an old belt. Cut the belt to length then drill holes through (or use the existing belt holes) and rivet the belt in place, using the original carry handles on the toolbox as your attachment point.


 More from Upcycling Outdoors:

Excerpted with permission from Upcycling Outdoors, by Max McMurdo. Photography by Brent Darby. Published by Jacqui Small, an imprint of The Quarto Group, © 2018.


