Throw a splash of color into your living space by learning how to make decorative pillows at home. Sew unique, inexpensive pillows that complement your existing décor.
Sewing Knife Edge Pillows
Pillows soften a room and invite guests to lounge a little longer. They make a stern sofa inviting and an impersonal room lived in and real. Pillows offer a way for guests to customize their seating and make furniture flexible. A comfortable sofa for a person of average height may be too deep for someone of diminutive stature, unless they have pillows to shorten the seat. The arm of a sofa becomes the head of a bed, and a wooden coffee table becomes a plush footrest. Guests can even find comfort on the floor with the support of a throw pillow.

How Many?
How Big?
Throw pillows are measured flat — from seam to seam. When they’re filled, they become fatter, shorter, and less wide. A 20″ pillow only fills 16″-18″ of space when stuffed, so remember to increase the size to accommodate for loss of height and width. The most common sizes for throw pillows are 14″ × 20″ for rectangular pillows and 18″-22″ for square. On low-back furniture, I prefer pillows with a height close to that of the inside back. For pieces like wingbacks, the height may vary from the top of the arms to mid-back, and is often decided by the fabric pattern and whether the pillow size detracts from the focal point of the chair. Furniture with extra-deep seating benefits from a thicker pillow, so consider adding boxing to these pillows to increase their girth.
What Style?
If the pillows are the pop in your room, by all means, don’t hold back. Otherwise, introduce pillows that communicate, but don’t dominate conversation. In rooms with bold use of pattern and color, I refrain from accessorizing with tassels, beads, and baubles, though the same can be lovely in an understated space. Styling of pillows is more a concern of personal taste than functionality; although a fussy pillow covered with sequins and tassels is more likely to be appreciated from a distance. Fabric choice on pillows can play an important role in the success of a room. When a piece seems disconnected from its counterparts, add a throw pillow in a neighboring fabric or introduce a new fabric that relates to another piece in the room. On the other hand, a perfectly coordinated and matched ensemble benefits from a little zing of dissonance subtly interjected by a throw pillow.
The Design Plan
With the variety of shapes, colors, and patterns in the room, the goal of the pillows is to create a web of connections that links each individual piece to the community of furniture in the space. It’s through this chain of connections that we can introduce fabrics that are unconventional, yet surprisingly relevant, making a more interesting combination of textiles. Solid velvet pillows add blue to my room, helping to connect the wall color and balance the cool and warm colors. I’ve chosen a knife-edge styling and 14″ × 20″ size, which will work with any piece in the room, from the sofa to the slipper chairs, without overcrowding the seat.

Basic Supplies
- Thread
- T-pins
- White or yellow chalk
- Tools & equipment
- Hand-stapling plier and staples (optional)
- Scissors
- Sewing machine
- Single-welt cord foot or zipper foot attachment
- Square
- Yardstick
- Materials
- Fabric
- Pillow inserts
- Zipper chain
- Zipper pulls
Sewing a Knife-Edge Pillow
- Add 1″ of seam allowances to the height and width of every pillow to determine the pillows’ cut size. The blue, knife-edge pillows will be 15″ tall × 21″ wide when cut. The velvet fabric is 55″ wide, so we can place two pillow faces side by side. We need four faces (two for the front and two for the back), or 30″ of fabric, which rounds up to 1 yard.
- Use the cut dimensions to draw and cut out the solid blue pillows. Use a square and yardstick to keep the edges square to the grain of the fabric. Be sure the nap is smoothest from the top to the bottom of the pillow.
- Fold one face in half height-wise and cut a tiny notch to mark the middle of the bottom edge.
- Make the zipper 1″ shorter than the finished width of the pillow (19″). Center the zipper chain over the bottom edge and mark the ends on the backside of the fabric in chalk.
- Place both faces together with good sides facing and edges aligned. To keep the fabric from shifting as you sew, use T-pins or the hand-stapling plier to attach the fabric pieces together around all four sides. Attach the staples as close to the edges of the fabric as possible.
![]()
- Begin sewing 1/2″ inside the mark made for the end of the zipper. After 1/2″, backstitch the seam to lock the threads in place. Continue stitching around the pillow, pivoting the fabric under the sewing foot at every corner, until you are 1/2″ past the mark at the other end of the zipper. Backstitch again to lock the threads and remove the fabric from the machine.
- If you used the hand-stapling plier, remove the staples by sliding the tip of the scissors under each one to lift it out.
- Attach the zipper pull to the zipper chain. Stitch a small piece of doubled-over fabric to each end to prevent the pull from sliding off.
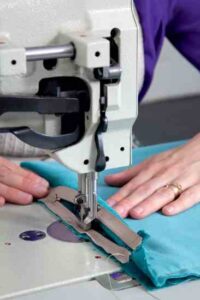
- Separate the bottom edges of the pillow and lay the zipper face down with the right half on top of the bottom seam allowance. With the zipper centered on the bottom edge and the right edge lined up with the edge of fabric, place the zipper teeth under the single-welt cord foot and stitch along the right side from one end to the other. As you approach the zipper pull, stop, lift the foot, and move the pull to the rear of the foot.
- Beginning with the end you just finished, repeat step 12 to attach the other side of the zipper to the other seam allowance.
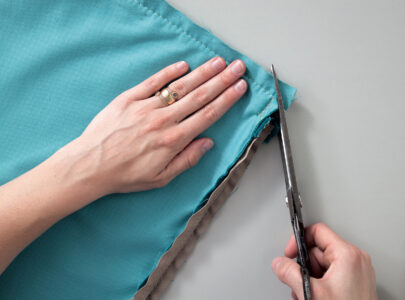
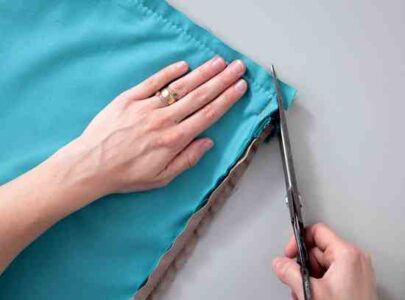
- Cut off the seam allowance at the corners without cutting through the stitch, and remove any staples.
![]()
- Turn the pillow right side out and use your fingers to push the corners out to the fullest extent. Then fill with the insert of your choice. I used 14″ × 20″ cluster fiberfill inserts.
Want more projects from Spruce? Read Repair Jute Webbing on Classic Furniture.

Excerpted from Spruce: A Step-By-Step Guide to Upholstery and Design © Amanda Brown, photography © Ryann Ford, used with permission from Storey Publishing, 2013.


