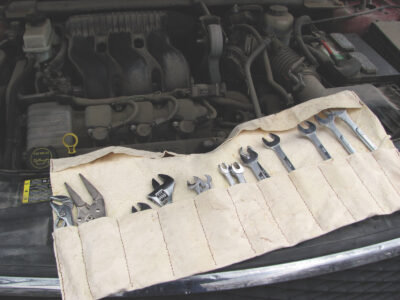
Looking for leather projects for beginners? Turn a tanned hide into a deerskin leather tool roll with pockets that will keep your preferred tools organized for service and storage.
In these pages, I’ve published a series of articles on making useful, beautiful items out of home-tanned hides. In this article, I’ll continue that series by describing how to make a versatile tool roll from a leather deer hide. (To try your hand at my other projects, see “How to Tan a Deer Hide,” October/November 2016; “How to Make Your Own Moccasins,” February/March 2017; and “Craft a Better Leather Apron,” December 2018/January 2019.)
For this project, use the middle portion of the deer hide, from the neck to the hips. The dimensions for the tool roll are 20-1/2 inches tall by as wide as possible. When choosing a hide, pick one that gives you a lot of hole-free leather so you can get the largest tool roll possible.
If this is your first leatherworking project, you’ll need to learn a couple of terms: The “grain side” of the leather is the smooth side that held the hair before tanning. The “membrane side” is rough or sanded, and was the inside of the hide. Most finished leather projects, including this one, are grain-side out. Make any marks on the leather’s membrane side so they aren’t visible on your finished project.
Materials and Tools
- Leather
- Tape measure
- Square
- Utility knife
- Binder clips
- Permanent marker
- Rotary leather punch or awl
- Four-hole leather punch and hammer
- Artificial sinew
- 2 leather-stitching needles
- Beeswax
- Scissors
- Lighter or matches
- Ruler
Cut the Deer Hide
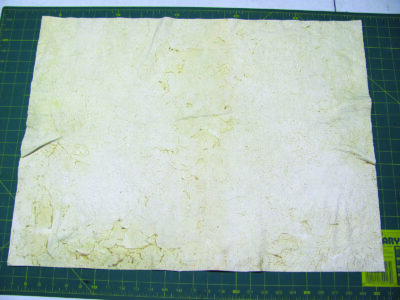
Lay the hide out on a large, flat surface, and determine where you can get the largest 20-1/2-inch-tall piece of hole-free leather. Using the square and the utility knife, cut out the piece for the tool roll.
Form the Tool Pockets
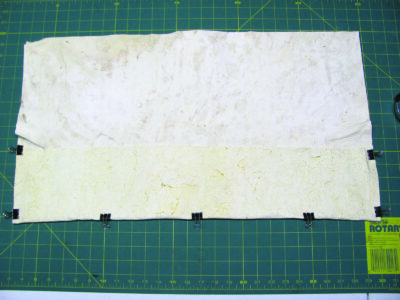
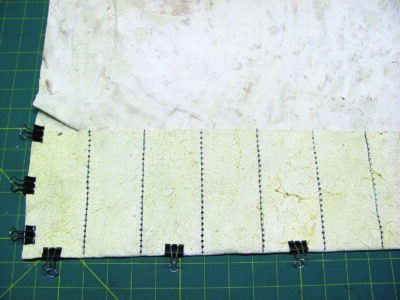
Place the leather on a table or workbench grain-side up. Grab the bottom corners, fold 5 inches of the leather up, and clip it in place with several binder clips. This flap will become the tool pockets. Each individual pocket is 2-1/2 inches wide. Using the square and marker, and beginning at an edge, lightly mark vertical lines every 2-1/2 inches along the folded section. Before marking lines, make sure you’re drawing on the membrane side of the leather. Depending on the overall width of the leather, one of the edge pockets may not be 2-1/2 inches wide. You can store a pencil or narrow-handled tool in it.
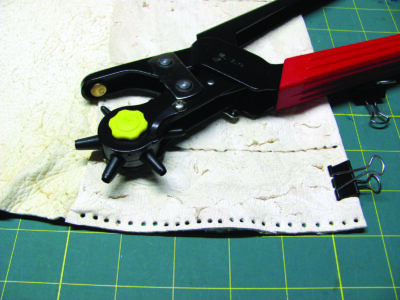
Using an awl or the four-hole punch and hammer, punch holes about 1/4 inch apart on the lines, through both layers of leather. Begin the holes about 1/4 inch up from the fold, and punch toward the top of each pocket. Don’t punch the holes on the right and left edges of the leather yet; leave that for later.
Unclip the leather and turn it over so it’s membrane-side up and the pocket flap is positioned at the bottom (or closest to you). Turn the pocket flap up; align the rows of holes that form the pockets, as when you punched them; and clip the flap in several places with binder clips. Using the artificial sinew, stitching needles, and a saddle stitch, sew each line of holes to form the individual tool pockets.
Sew with a Saddle Stitch
You’ll be stitching with one strand of sinew, which needs to be four times the length of the seam. When it’s cut to length, thread one end through a stitching needle. Pull the sinew a couple of inches through the needle. Drag the sinew over the block of beeswax a few times. For this project, start at the bottom of the pocket (the hole nearest to the fold). Pass the needle and half the length of sinew through the first hole in a seam, and even up the ends so there’s an equal length on both sides of the leather. Thread a stitching needle onto the other end of the sinew so you have a needle on both ends of the sinew.
Consistency is the key to making a good saddle stitch. Pass the needle on the front side through the next hole in the seam and out the back side of the leather. Before pulling it tight, pinch the sinew toward the front of that hole. Pass the back-side needle through the back half of the same hole and out the front side, being careful not to snag the sinew already in the hole. Then, pull both lengths of sinew snug to the leather. Repeat this along the seam, always pushing the front-side needle through first, and then passing the back-side needle through the same hole.
When you reach the last hole of the seam at the top of the pocket, stitch back along the seam for three holes. Since you’re doubling the stitches in these holes, be careful not to snag the sinew already in the holes. At the fourth hole, push the front-side needle through the front-side hole, and rather than passing it through the back-side hole, angle the needle and push it out the seam from between the pieces of leather. Do the same with the back-side needle, pushing it through only the back-side hole and out the seam between the pieces. Make sure that both needles and the trailing sinew are on the same side of the seam.
Remove the needles, gently pull the sinew tight, and tie the ends together with a square knot. Make sure to cinch the first half-hitch of the square knot snug to the leather. Clip each strand about 1/4 inch from the knot. With a lighter or matches, carefully singe the sinew to the knot. To set the stitches, lay the seam on a flat surface and use a hammer to gently tap the length of the seam a couple of times.
After you’ve sewn the pockets, punch holes at the right and left edge with the rotary punch or awl. Sew the edges with a saddle stitch.
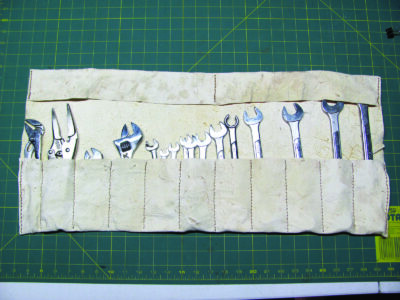
A flap at the top of the leather tool roll will prevent the tools from falling out when you’re carrying the roll to a work site. To make this flap, fold over the top 2 inches, and clip the flap into place. Saddle stitch this flap at both outside edges, and stitch one row down the middle.
Add a Tie That Binds
Even though this is a utilitarian piece, I still like to add personal embellishments. One of those is a braided strap for the tie. Making such a strap is also a good use of the thin leather from the sides of a deer hide.
To create the braided strap, use a ruler and utility knife to cut a strip of leather 1 inch wide and as long as possible. Leave a 1-1/2-inch-long section at one end uncut, and slice the strip lengthwise into three equal sections. So, each section should be 1/3 inch wide.
Braid the pieces together. To make a three-strand braid, tape the uncut end of the leather strip to the table or workbench. Take one of the outer strips and lay it over the middle strip (I prefer starting with the left-side strip). Pull snug, so that the outer strip you chose is now the middle strip. Then, take the opposite outer strip, lay it over the middle strip, and gently snug the pieces to remove any slack. When braiding with flat strips, pull just enough to remove the slack, but not so much that the strips roll. Continue braiding until you’re about an inch from the end. Secure the end temporarily with a binder clip.
Create a Common Whipping Knot
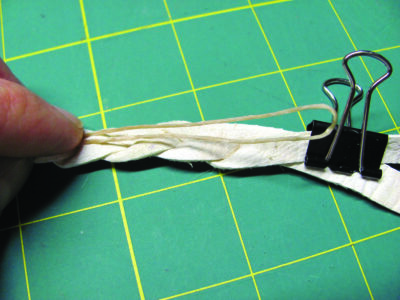
Bind the ends of the strap with a common whipping knot. Using the scissors, cut about 6 inches of artificial sinew. At one end of the sinew, form a loop about 2-1/2 inches long, and lay it on the braided strap so the loop is near the binder clip and the opposite end is about 2 inches from the binder clip.
Take the long end of sinew and wrap it over the braided strands toward the loop several times. After wrapping for about an inch, pass the working end through the loop.
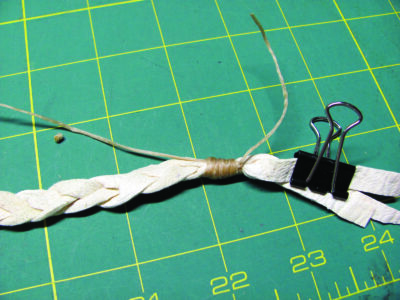
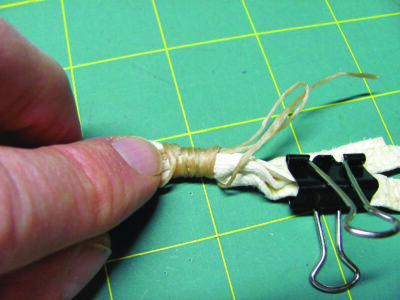
Grab both ends of sinew and pull them tight. Pull with enough force to slide the looped end under the wrap and cinch the whole length of the wrap against the braid.
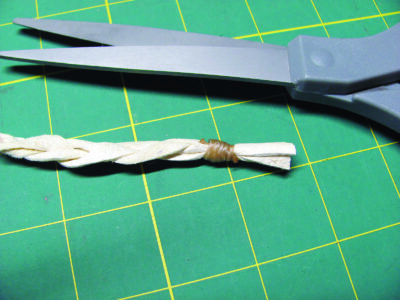
Cut the ends of the sinew close to the wrap. Then, trim the end of the braid. Finally, whip the opposite end, and trim. You can also use this type of whipping knot to keep the ends of natural fiber rope from fraying.
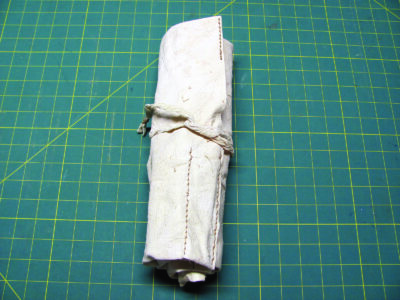
Whether you use your DIY tool roll for screwdrivers, wrenches, woodworking tools, or a combination of these, with this versatile accessory on hand, you’ll always have the right tools for the job at your fingertips.
Dennis Biswell has been tanning hides at home for more than two decades. He shares his love of making and sewing leather at MOTHER EARTH NEWS FAIRS across the country.


