Learn how to turn a simple wooden stave — which you can cut to size yourself — into a stick bow, complete with homemade bowstring, designed perfectly for your shooting style and preferences.
This past spring, I was fortunate to attend a weeklong course in primitive bow-making taught by Brad Salon and Sarah Corrigan at Roots School in eastern Vermont. Salon and Corrigan are experienced bowyers and members of the primitive-technology community. Far from being a synonym for “crude,” in this context, “primitive” refers to the re-creation of Stone Age technologies with simple tools and basic, natural materials.
The bows my classmates and I made are “self bows” carved from single riven staves of Osage orange wood. As novices, we used modern tools for speed and accuracy, but you could make this bow using only stone tools.
Lethal Geometry
Most bow-making is done by feel, but there’s still a little math involved to determine your bow and draw lengths. Stand with one fist outstretched, as if holding a bow, and bring your shooting hand back to the anchor point you’ll use with this bow. Your draw length is the distance from the knuckles on your fisted hand to the anchor point you choose. Mine, with an anchor point at the corner of my mouth, is 27 inches.
The limbs of your bow must be at least equal to your draw length. To determine the minimum length of your bow, multiply your draw length by 2, add 4 inches for the handle, and add another 3 inches (1-1/2 inches on either side of the handle) for the fadeouts. My bow needed to be at least 61 inches long.
In addition to measurements, consider your stave’s geometry. Are there checks or knots that will need to be avoided or removed? At the length you need, will the tips and handle align vertically? The limbs can snake from side to side dramatically in between, as long as the tips and handle make a straight line.
Bow-Making Terms
Anchor point: Any specific point on the body used to anchor the archer’s hand at full draw during every shot for consistency, such as the corner of the mouth.
Back: The surface of the bow that faces away from the archer when the bow is being drawn.
Belly: The surface of the bow that faces the archer when the bow is being drawn; the side with the bowstring.
Bowstring knot: A round-shaped knot that can slide freely along the cord around which it’s tied, used, for example, to create a lasso. Tie an overhand knot, bring the end of the cord around and back through the overhand knot, and then tie another overhand knot in the end of the cord to act as a stopper.
Centerline: The straight line that runs through the middle of the bow handle and the center of the limbs to the tips.
Checks: Long cracks that appear on the surface of a stave, perpendicular to the grain, as the drying sapwood shrinks around the heartwood.
Draw length: The distance from the back of the bow to the anchor point for any archer at full draw.
Draw weight: The pounds of pull exerted on the bowstring when drawn a specified braced distance. (It’s commonly measured at 28 inches of draw length.)
Fadeouts: The tapered piece of wood that fades out into the limb from the riser.
Limbs: The two working parts of the bow that extend from the fadeouts to the tips.
Nocks: The grooved tip of the bow limb that accepts the bowstring.
Overhand knot: A simple and common stopper knot, used, for example, to stop the end of a cord from untwisting. Make a loop at the end of the cord, draw the running end of the cord through the loop, and pull tight.
Riser: The nonworking middle section of a bow that separates the limbs.
Stave: A full-length, unspliced piece of wood.
Tiller: The difference between the upper limb and lower limb measurements from the bowstring to the belly at the fadeout when the bow is at rest.
Tillering: The adjustment of tiller by removing material from the bow limbs.
Tools and Materials
- Dull drawknife
- Pencil
- Measuring tape
- Sharp hatchet, drawknife, or band saw
- Half-round rasp
- Rectangular and gooseneck cabinet scrapers
- Chainsaw file
- Bow stave, 1 foot longer than finished bow length (see “Strength and Flexibility,” below, for details on how to cut your own)
- Bowstring (see “Making Bowstring,” below, to learn to make your own)
- 100-grit sandpaper
- 220-grit sandpaper
- Tung oil and rag
Shaping the Back and Profile
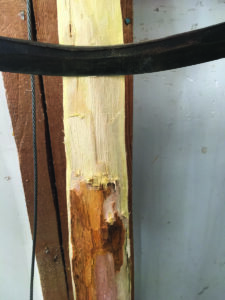
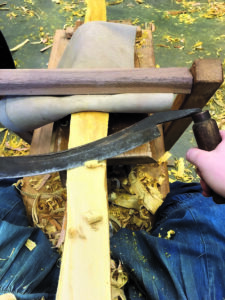
You’ll work the bow primarily from back to front, starting by unearthing a single, unbroken growth ring from the bark side of the stave. The bow’s ability to tolerate elastic tension — the force the back will be under when the bow is fully drawn — is derived from a layer of unbroken fibers running the length of the back. Use a dull drawknife to scrape off the bark and sapwood; in Osage orange, the sapwood is noticeably lighter in color and more open in structure than the deep-orange or yellow heartwood. Next, pick a single late-wood growth ring to work toward. Wood grown in summer is denser than that grown in spring, and you’ll be able to feel the difference in structure between seasons as you pull your drawknife through the wood. If you break through the growth ring you were aiming for, take a deep breath, and start working to the next one down.
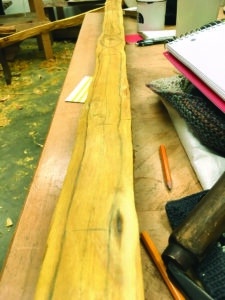
When you have a smooth surface, draw the centerline of the bow in pencil, following the general flow of the grain. Determine where the bow tips will be, and the center of the handle, and then roughly measure and mark the profile of the bow. The handle and fadeouts can be relatively narrow, but the limbs should start at about 2 inches wide and taper gradually over two-thirds of the bow’s length, and then sharply to the tips. Make the tips no less than 1/2 inch wide. Avoid placing any knots on the edges of the bow, and be sure to follow the path of the centerline precisely — the aim is for the profile to be mirrored throughout.
Rough out the profile with a sharp hatchet or a drawknife, or use a band saw. Cut just outside your markings; you’ll refine the profile as part of the tillering process, when you’re perfecting the flex of the bow. Likewise, you can rough out the belly now, leaving the handle and fadeouts relatively thick, and bringing the limbs down to no less than 1 inch.
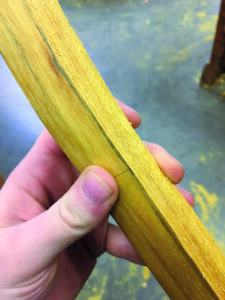
Ideally, you’ll want to create a rectangular cross-section for your bow, so angle the initial profile cuts outward from the back, and make two angled cuts to define the belly, forming a roughly pentagonal cross-section. Rasp from the back toward the belly to bring the profile edges down perpendicular to the back, and to avoid splintering the edges of the back.
Use your fingers as calipers to judge the smoothness of the taper from the center to the tips of the limbs. There shouldn’t be any spot where the limb widens as you move toward the tip. When the taper is perfect, use the rectangular cabinet scraper to remove all tool marks from the flat surfaces, and the gooseneck scraper for tighter spots. Lightly bevel the edges of the back to avoid having a delicate, sharp corner that would be prone to splintering in use.
Bellies Up
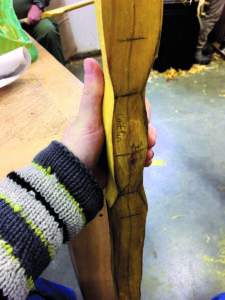
Next, start refining the belly and tillering. You’ll need to work slowly over the entire bow at this stage; while every step is important, this is the point where you can most easily turn a functional bow into little more than an unusable art piece. Again, you’ll be creating a smooth, gradual taper from the fadeouts to the tips of the limbs, with no sudden dips or bulges, and as the bow gets closer to being finished, every layer of wood you remove will make a bigger change to the draw weight.
First, rasp away the ridge in the center of the belly, until it’s flat and perpendicular to the profile edges. “Floor tiller” the limbs by bracing one tip against the floor and pressing on the handle in the direction the bow will bend when it’s in use. Pay attention not only to how much the limb bends overall, but also to where it’s too stiff or too flexible. Gently rasp down stiff spots, and avoid working flexible spots further.
As you shape the limbs, you can also work the profile and belly of the handle until it’s comfortable in your hand. Avoid making the handle with a definite “top” and “bottom” until you know which end of the bow is up. (If your stave has side-to-side wiggles, there may be only one direction to hold the bow without getting your forearm slapped by the string.)
Check the bend with every rasp pass, and when you think you’ll be able to string the bow, shape the tips. For the tips, you can rasp from the belly and sides toward the back, making them into rounded points from the profile and the belly, like the prow of a boat. The goal is to reduce the mass at the tips without making them too weak to support the string.
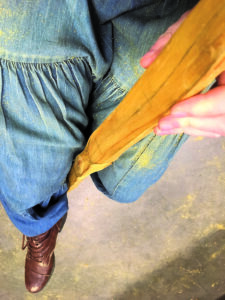
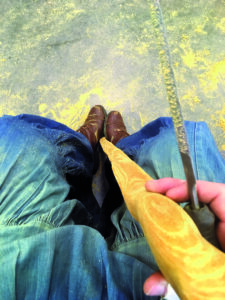
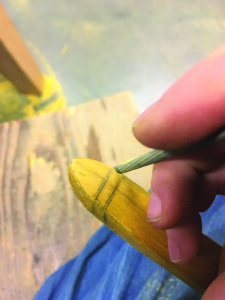
When you’re happy with the shape of the tips, use a chainsaw file to work the nocks. These should be about 1 inch below the tip, and flared very slightly downward from the back to the belly, to make room for the string to shift as it’s placed under tension. The chainsaw file’s teeth will clog easily, so wipe the file backward on your pants or a rag often to keep it biting well. Make the nocks as deep as the file, and try to place them level across the back. (This is mostly a matter of aesthetics; uneven nocks will still function.)
Final Tillering
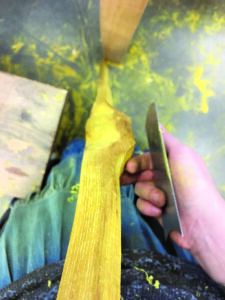
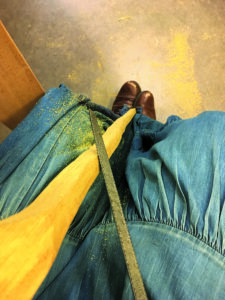
After you string your bow for the first time, you’ll be working on the final tiller, and your bow-making pace will slow to a crawl. Remove any unnecessary remaining wood slowly and evenly, progressing from gentle rasp passes alternating with cabinet scrapers, to only scraping tissue-thin layers of wood.
To string the bow, tie a bowstring knot — the same knot commonly used for lassoes, because it makes a loop that can be easily loosened after undergoing tension — in the string about 4 inches shorter than the length of the bow. You never want to put a bow under greater stress than it will bear when it’s being shot, so the initial stringing will be very gentle. Your string will probably stretch out completely; simply adjust the knot higher and restring until the bow stays lightly bent.
Assess the limbs. Are they bending evenly, both when compared with each other and along the length of the limb? If not, note stiff areas and rasp them gently, and then restring and reassess. Continue rasping and restringing until the bow bends evenly along both limbs.
You can then start gently drawing the bow, starting at about one-quarter to one-third draw, and judging the draw weight. If the bow is heavier than you want, rasp the limbs down evenly, scrape out all the tool marks, and restring. Draw again, working up to half-draw, and then to full draw, always checking the evenness of the limbs to each other and along their lengths.
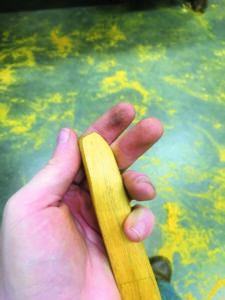
When you can draw the bow fully, switch to cabinet scrapers only, working the belly and the profile as needed to keep the limbs proportional. At this stage, every pass removes a greater percentage of the remaining wood, so work patiently. Brad Salon calls bows “sticks that are nine-tenths broken.” The trick at this stage is to avoid damaging the integrity of that final tenth of the original stave.
Finishing Your Stick Bow
When the bow is perfectly balanced and within about 1 pound of your preferred draw weight, use cabinet scrapers to remove all tool marks on the belly and profile, and to lightly remove the grime on the back of the bow. Sand the belly and sides with 100-grit sandpaper, and the back even more lightly, with 220-grit. Apply seven coats of tung oil, allowing at least an hour of drying time between coats.
You can add an arrow shelf and handle wrap to your bow after 2 to 3 coats of oil. A leather arrow shelf and suede wrap will reduce the noise of shooting, especially for hunting bows, and will ensure you’re always shooting from the same position on the bow.

Oil your bow every 6 to 12 months to keep the wood at its optimal moisture content, and if you’re going to shoot in the rain, apply a layer of Butcher’s paste wax or tallow to lock out excess moisture. Always draw halfway a few times when you start shooting, to work the wood fibers gently before you place them under stress.
For storage, hang your bow vertically on a peg, looping the string over the peg. Or, set your bow on a pair of horizontal pegs, placing the pegs out to the tips if you hang the bow belly-down, or close together in the center if you hang it belly-up. Gravity will work against the limbs following the string, and your bow will retain its original draw weight longer.
Strength and Flexibility
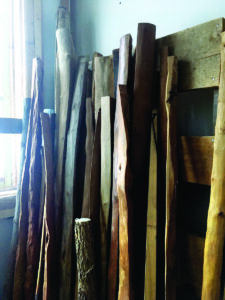
To make a resilient bow, you’ll need to choose a dense, long-fibered wood with good memory to keep the bow springy under long use. Osage orange is among the best North American options. (French trappers and traders called it bois d’arc, or “bow-wood.”) Black locust, hickory, elm, sugar maple, and white oak will also make good stick bows. Ash tends to break, and walnut is too brittle. Yew, the favored wood in Britain, often needs to be backed with linen or sinew to compensate for its lower ability to tolerate elastic tension.
If you’d like to cut your own stave, first choose a straight tree with minimal branching. Cut a thick log at least 1 foot longer than your desired bow length, dry it for a few weeks, and then split it along the checks that will start at the cut ends to form staves. Coat the stave ends with oil, varnish, or paint to slow drying and minimize further checking, and allow it to season for 1 to 2 years, until the moisture content measured with a moisture test meter reaches 8 to 10 percent.
Making Homemade Bowstring
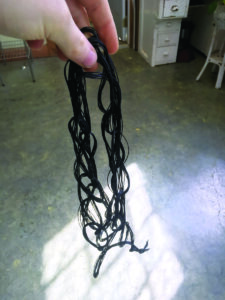
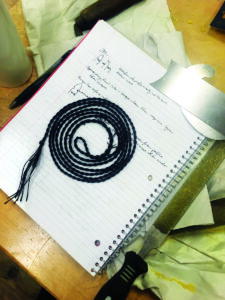
As a general rule of thumb, your bowstring should be able to carry four times the draw weight of your bow. My bow draws between 50 and 60 pounds, so my string needs to be able to handle at least 240 pounds of force. I made it with 16 strands of 50-pound waxed nylon cord, which adds up to about 800 pounds of force (16 x 50 = 800) — plenty strong enough for me, and for most archers.
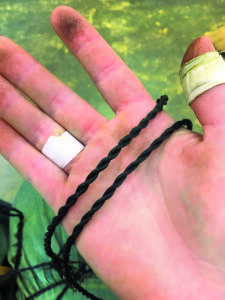
To make a bowstring, measure out 50-pound waxed nylon in two groups of eight strands, each 1-1/2 times the length of your bow. You’ll twist them together using a method called “reverse wrapping,” which is characteristic of cordage finds dated to the Stone Age.
Starting about 8 inches from one end of the bundle, pinch all the strands with one hand, and, with the finger and thumb of your other hand, roll one set of eight strands to the right. Cross the rolled strands left, over the other bundle, and roll the second bundle to the right. Cross the newly rolled bundle left, and roll the first bundle again. After a few twists, the cord will hold itself together.
Twist up 2 to 3 inches of cord, and then fold the short ends over to form the loop at one end of your string. To avoid a large lump (and weak spot) where all the ends stop, stagger the ends by cutting them to slightly different lengths, and incorporate eight ends into each bundle. Continue twisting and crossing, and don’t worry about any short tails sticking out of the cord — you can trim them flush later. Reverse wrap the entire length of your cord, and tie an overhand knot in the end.
Caitlin Wilson is an editor for MOTHER EARTH NEWS. Follow her projects on her blog Sunshine and Roses.

PREPPER’S SURVIVAL HACKS
This guide features easy-to-follow picture tutorials on how to build your own DIY survival projects (50 in all!). One of the prepping movement’s most prolific authors, Jim Cobb has taught readers how to fortify their homes, survive for weeks without electricity, and prepare themselves financially for years of economic turmoil. Now he turns to some of his favorite DIY projects to teach his thousands of fans how to create cheap, easy, and ingenious tools to help survive any natural disaster.
Down-and-dirty survival techniques teach readers how a couple of plastic soda bottles and an old credit card can easily become the world’s smallest fishing kit. Have a couple keys from an apartment vacated long ago? Cobb shows how they can easily become makeshift arrowheads. He also explains how to turn an old hardcover book into a hidden safe for small valuables and cash. Prepper’s Survival Hacks is filled to the brim with intriguing, fun, and innovative projects to secure any home. Order from the MOTHER EARTH NEWS Store or by calling 800-234-3368.


